
A credible solar proposal begins with more than roof area and monthly electricity use: it must account for shade, structure, wiring, export limits, approvals, and the documents needed for payment support. By the end, you will know what to prepare, what to ask an installer to measure, which tasks belong to each party, and which records to keep after commissioning.
Key takeaways
- Request roof, structure, shade, access, and electrical findings in writing.
- Compare system designs by output, protection equipment, warranties, and maintenance access.
- Verify subsidy eligibility, application status, and beneficiary details on the official portal.
- Demand commissioning tests, warranties, manuals, and as-built drawings at handover.
What a Proper Site Assessment Examines
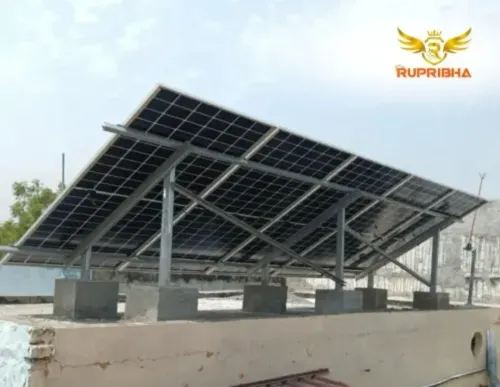
During the first technical visit, an installer should complete a solar site assessment, not merely measure roof area and monthly electricity use. A proper rooftop solar survey records roof dimensions, age and remaining service life, structural condition, attachment points, penetrations, drainage, walkways, parapets, equipment, and safe access.
It also identifies possible locations for modules, inverters, batteries, isolators, earthing, and cables.
1. A roof structural assessment checks whether the roof and attachment points can carry PV modules and racking, while resisting wind uplift and seismic forces. The survey should record roof material, damage, repair needs, and every proposed penetration.
2. A solar shade analysis maps trees, parapets, nearby buildings, tanks, and equipment across the full annual sun path. Ask to see the modeled shading assumptions and their effect on annual energy yield; a midday photograph cannot show seasonal losses or future tree growth.
3. The electrical review compares expected PV export or backfeed current with the service rating, busbar limits, transformer capacity, voltage-rise limits, meter arrangement, and utility interconnection rules. It should inspect the main panel, protection devices, earthing, connection point, and available cable routes.
4. Before the visit, prepare recent electricity bills, sanctioned-load details, the latest meter number and photograph, property ownership or occupancy proof, roof drawings, and photographs of the roof, meter, main panel, access route, and existing equipment. Tell the surveyor about planned construction, roof repairs, battery needs, and operating-hour loads.
Ask for measured usable area, proposed orientation and tilt, cable lengths, and any service upgrade or permission requirement.
How Site Findings Become a System Design
An installer turns measurements into a solar system design by matching usable roof area and electrical conditions to your load, service capacity, and safety limits. Panel orientation and tilt feed the production model, while shading and roof obstructions determine the actual module layout.
String design starts with the module’s cold-weather open-circuit voltage, not its nominal operating voltage. Because voltage rises as temperature falls, the maximum series-string voltage must stay below the inverter and equipment ratings at the site’s design minimum temperature. The design also checks maximum current, parallel-string protection, and the inverter’s permitted DC input range.
A credible proposal identifies:
- Module count, layout, setbacks, panel orientation and tilt, and the estimated annual yield with its weather-data source and loss breakdown.
- Inverter sizing, including the DC-to-AC ratio, clipping at peak output, maximum DC voltage, current, and power limits.
- Solar cable sizing based on route length, current, voltage drop, insulation, temperature, and installation method.
- DC and AC disconnects, string overcurrent protection, surge protection, grounding and bonding, and arc-fault or rapid-shutdown measures required by the adopted code.
Battery storage adds capacity and power calculations plus a suitable location, environmental controls, disconnects, emergency shutdown, fire separation, and thermal-runaway protection. The proposal must also compare export current with service, busbar, transformer, and voltage-rise limits; the utility or authority approves the final interconnection and permission to operate.
Which Tasks the Installer Handles—and Which Stay With You
The installer handles design coordination, installation, testing, and much of the paperwork; you remain responsible for authorising applications, providing property documents, and paying charges not included in the contract. The utility or local authority makes the final approval decision.
| Task | Installer normally handles | You or the authority handles |
|---|---|---|
| Solar permission process | Prepares drawings, equipment details, forms, and submissions | Signatures, ownership or occupancy proof, fees, and authority approval |
| Net metering application | Completes technical schedules and tracks the file | Applicant declarations; the discom approves the connection |
| Discom inspection | Coordinates access and corrects installation issues | You provide access; the discom conducts inspection and issues permission to operate |
| Civil work | Mounting structures, cable routes, and agreed waterproofing work | Roof repairs, structural strengthening, permits, and extra work unless quoted |
| Meter changes | Supplies specifications and coordinates scheduling | The discom replaces or seals the meter and charges its own fees |
| Connectivity | Configures monitoring equipment and explains the app | You provide reliable internet, router access, and ongoing service |
| Repairs | Corrects workmanship defects covered by the warranty | You pay for pre-existing roof faults, damage from other trades, or excluded parts |
Read the contract’s solar installation responsibilities line by line. It should name who pays for scaffolding, earthing upgrades, service-capacity changes, inspection fees, and repeat visits after a failed inspection. A subsidy administrator can reject a late or incomplete file even when the installer assembled it.
How to Check a Subsidy or Incentive Claim
A quoted benefit is not payable simply because panels are installed. The authority, utility, tax office, or programme administrator decides eligibility, and it can reject an incomplete or late claim.
1. Identify the benefit before signing. Ask whether it is a rebate, grant, tax credit, net-metering payment, renewable-energy certificate, or performance incentive. Confirm the applicant, eligible costs, capacity limit, ownership rule, deadline, and whether approval is required before construction.
2. Check the programme’s approved supplier rule. Some schemes require an approved solar vendor and submission through a government solar portal. Record the application number, approval date, and any requirement to use listed equipment or obtain inspection before commissioning.
3. Assemble the solar subsidy documents. Keep the signed contract, property or occupancy proof, separate invoices for eligible and ineligible work, equipment model numbers and serial numbers, proof of payment, inspection records, commissioning certificate, and permission-to-operate evidence. Commercial projects do not automatically receive residential benefits; U.S.
businesses must test the applicable Section 48 or Section 48E rules, including records for domestic-content, energy-community, wage, and apprenticeship bonuses.
4. Submit only after checking the deadline and payment trigger. The quoted amount is an estimate until the administrator awards it, and payment may follow approval, meter activation, tax filing, or a later verification.
Ask who files the solar subsidy application, who corrects rejected documents, and when the money is expected; do not treat it as a discount until written approval confirms it.
What to Demand at Handover—and How to Compare Installers
Do not accept a switched-on inverter as handover. A proper solar commissioning report identifies the site, commissioning date, test results, readings, defects, and permission-to-operate or final inspection status. It should match the installed equipment and serial numbers, not a generic template.
- Receive the as-built single-line diagram, array layout, cable routes, earthing points, protection devices, disconnect locations, and inverter settings.
- Ask for insulation-resistance and polarity results, torque records, labels, protection-trip tests, meter configuration, and monitoring login details.
- Keep solar warranty documents, operating instructions, equipment serial numbers, itemised invoices, proof of payment, and signed completion records.
- Confirm who will correct faults, submit remaining utility or subsidy documents, and respond when monitoring stops reporting.
A solar installer comparison is stronger when it tests the evidence behind the promise:
| Installer evidence | What it demonstrates | Warning sign |
|---|---|---|
| Project-specific commissioning report | The system was tested at your site | One-page invoice marked “installed” |
| As-built drawings and serial-number register | The design matches what was built | Proposal drawings reused at handover |
| Utility approval or permission-to-operate | The connection was accepted by the authority | “Approval pending” with no reference number |
| Production model and monitoring setup | You can compare forecast with actual output | A nameplate capacity presented as generation |
Rupribha Electricals (OPC) Private Limited can demonstrate project support by walking you through these records, showing test readings, explaining inverter settings, and identifying any open item by owner and deadline. A sales-only visit usually supplies brochures and a price; a project handover leaves an auditable file.
Related product
 | Solar Products ₹200000 3KW Solar power plant subsidy based system in Delhi, you will get subsidy up to 78000/-Rs. View product → |
Frequently asked questions
What should a solar site assessment examine?
It should record roof dimensions, age, remaining service life, structural condition, attachment points, penetrations, drainage, walkways, parapets, existing equipment, shade, electrical capacity, and safe access.
How do site findings affect solar system design?
Roof orientation, shade, usable area, structure, cable routes, electrical loads, and access determine the array layout, inverter selection, mounting method, protection equipment, and expected generation.
Which solar installation tasks remain the customer’s responsibility?
The installer can survey, design, install, test, and support documentation. You remain responsible for providing accurate bills and property information, granting access, approving the design, paying charges, and checking claims before signing.
How can you check a solar subsidy or incentive claim?
Confirm the programme name, eligibility rules, approved equipment requirements, application reference, beneficiary details, payment stage, and installer status on the responsible government portal or with the issuing authority.
What should you demand at solar system handover?
Request commissioning results, single-line and as-built drawings, equipment serial numbers, warranties, manuals, protection settings, maintenance instructions, permissions, meter or interconnection records, and contact details for service.